
how to manage access control in azure databricks with SCIM API.

introduction.
There are plenty of ways to provide access to an Azure databricks workspace such as access tokens, managed identity with contributor rights or the SCIM API. I strongly advocate to use SCIM API since you can manage access on the most granular level and thus implement the principle of least privilege. Admittedly, it can be a bit cumbersome to write the code anytime you want to change access control as no GUI:t exists (yet). This blog post provides a simple python script for managing access that you can save to your Databricks workspace. So, no excuses for having a crappy access control structure in your databricks workspace! The same counts for managing your secrets and secret-scopes in Azure Databricks.
.
prerequisites.
1. Premium Azure Databricks workspace (the one in this blog post is named toms-databricks)
2. A notebook that you can run from Azure Data Factory (the one in this blog post is named datafactory-test)
3. A cluster that you can manage (the one in this blog post is named toms-cluster)
4. An Azure Data Factory (the one in this blog post is named toms-datafactory)
.
plan of action.
1. Why adding the contributor role onto the resource via managed identity is not enough
2. The SCIM API script for managing access control in Azure Databricks
3. How to add the python script to your workspace
.
1. Why adding the contributor role onto the resource via managed identity is not enough
First off, it is way better to use managed identity than manually retrieving an access token from databricks and pasting it into a connection string. Still, when giving contributor rights to a resource that shall access databricks, the resource is automatically provided admin user rights. With that it can literally do anything within the workspace. If you already know this including its implications, you can skip the following part. Otherwise, here a little walk-through on what happens, if you give a data factory contributor rights on an Azure databricks resource.
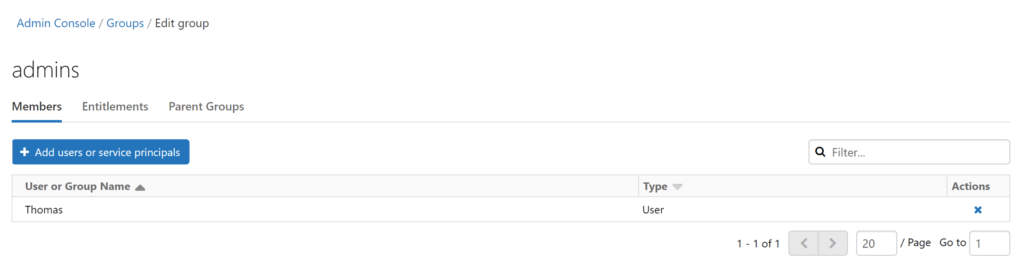
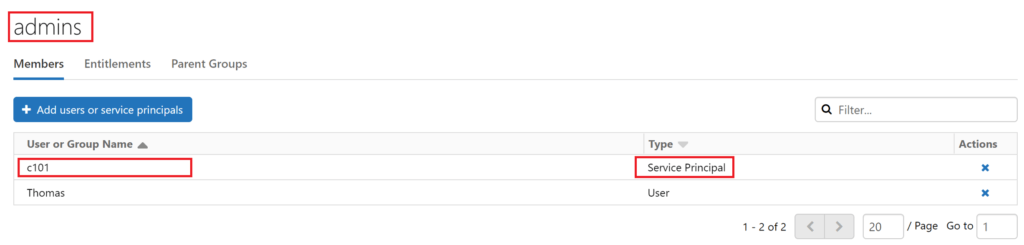
Our starting point is the spare resources without having given any access rights to the data factory, yet. Here a screenshot on all the members in the admin group so far. It’s just me…
.
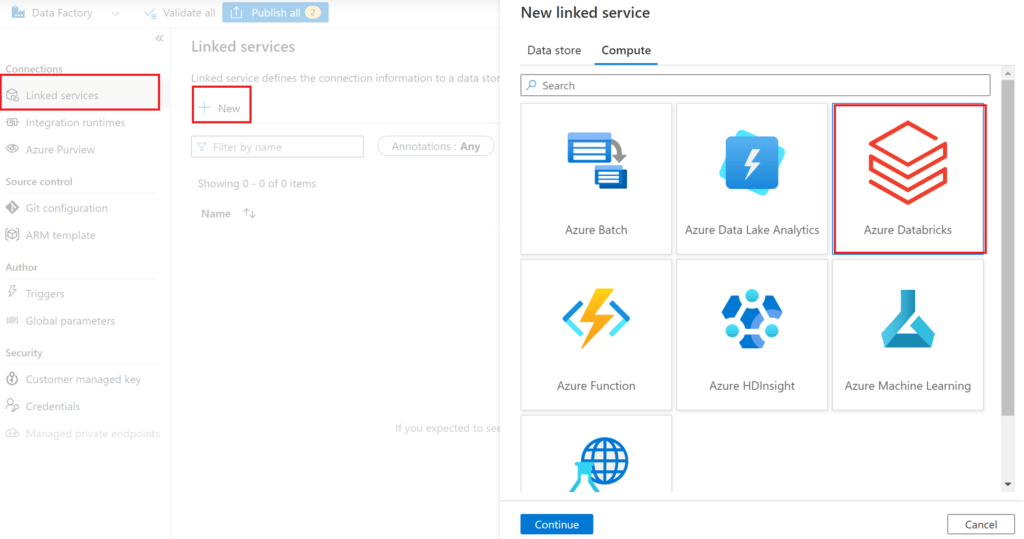
We start by creating a databricks linked service in toms-datafactory:
.
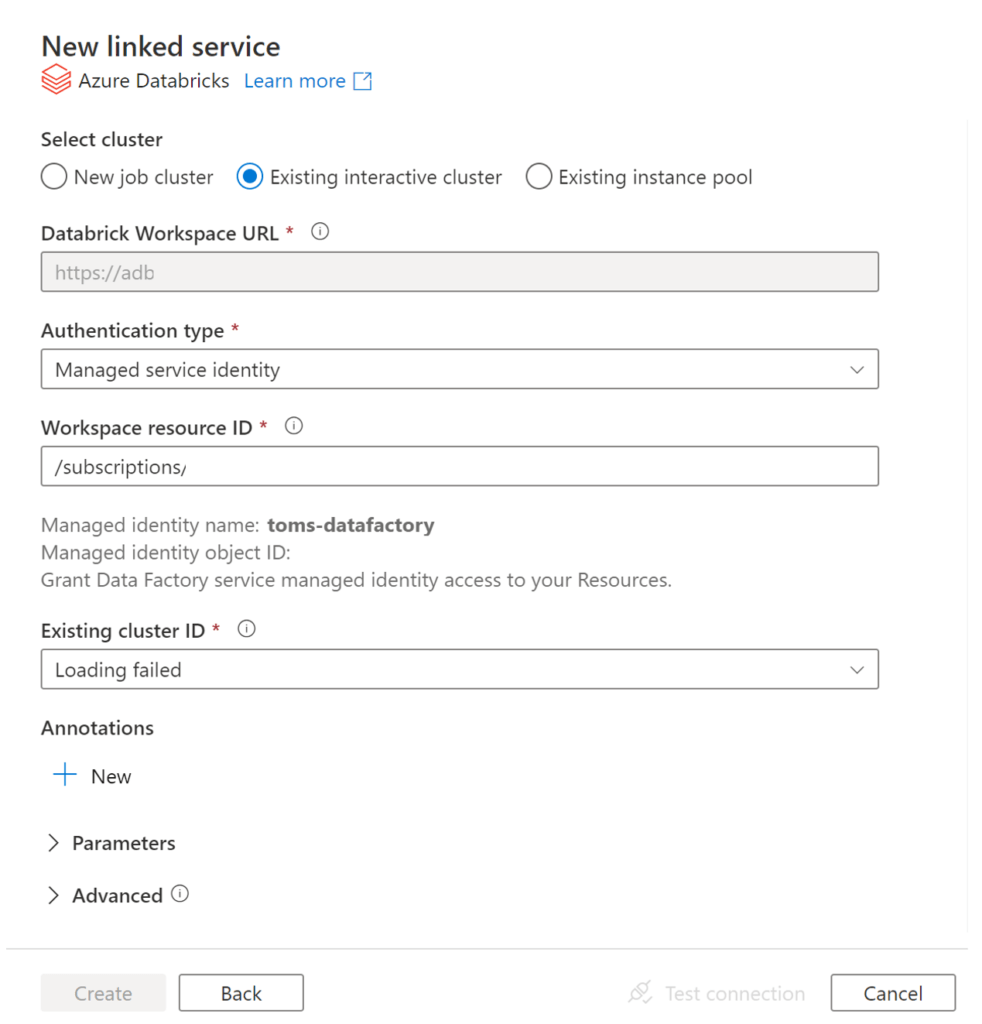
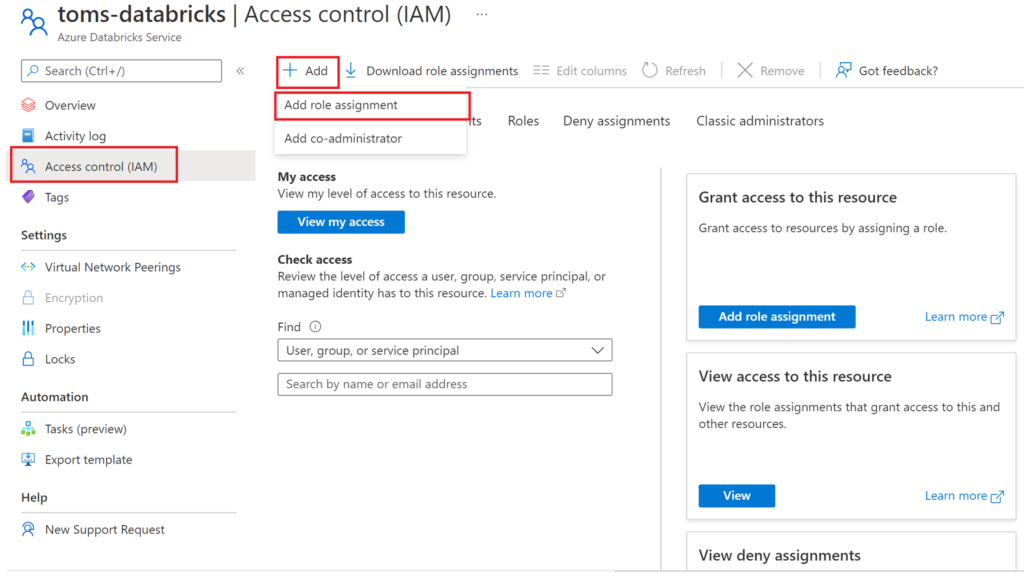
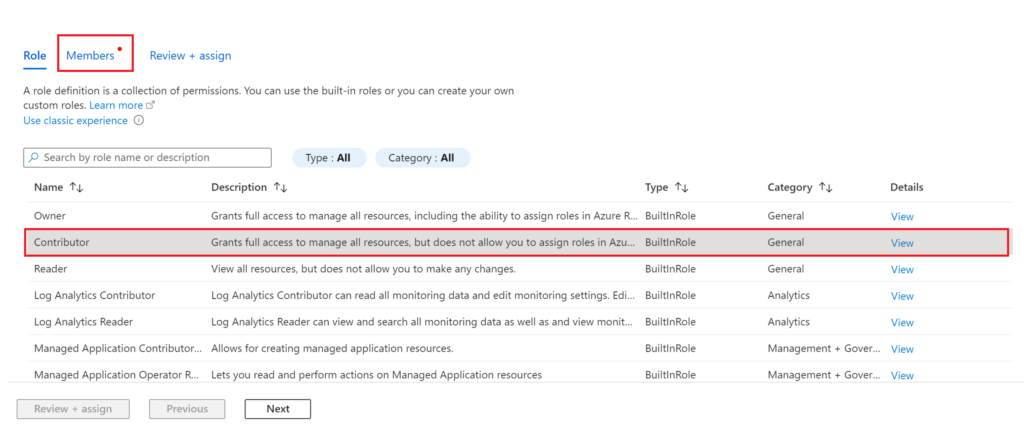
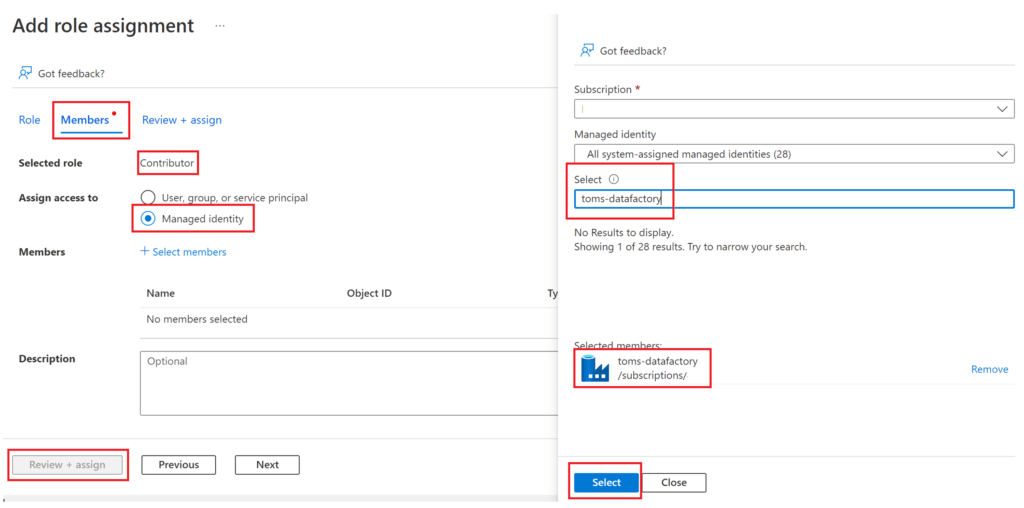
As seen in the screenshot above, it is not possible to click on the create button, since we can neither set up nor pick a cluster from the databricks workspace. So, let’s add toms-datafactory as a contributor to toms-databricks via the Azure portal:
.
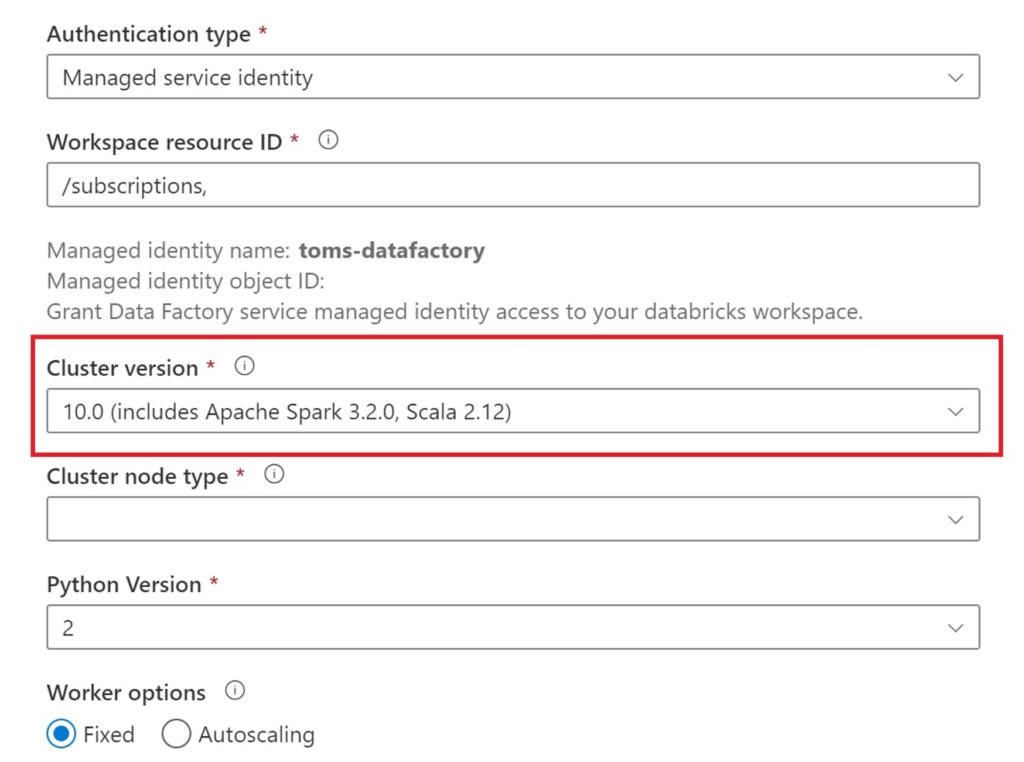
Now, let’s try again to create the linked service:
.
Awesome! We are able to either set up a new or pick an existing cluster from the dropdowns. Further, we are even able to create the linked service. However, as soon as you click on the dropdown, something else happens:

.
toms-datafactory was added as a user to our databricks workspace! But this is still not all. Glimpsing into our admin group, guess who is laying there:
.
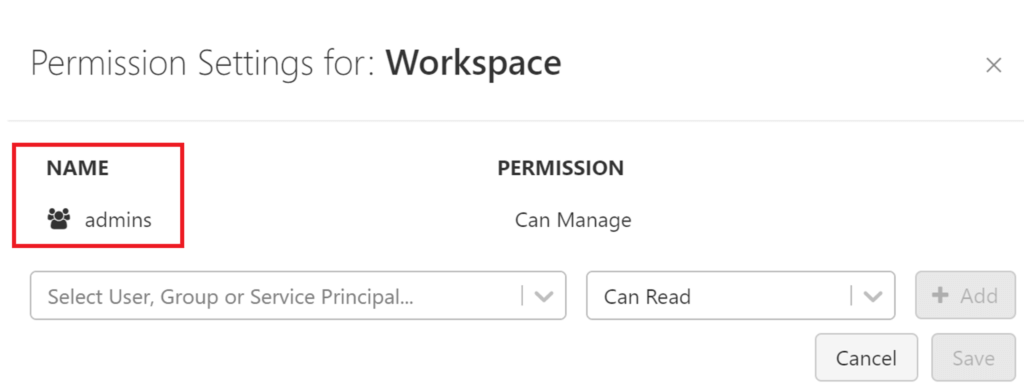
Alright, toms-datafactory made it into our databricks workspace as an admin, but what does this actually mean? Let’s investigate, what the admins group is allowed to do. Well, the group is called admins, obviously it is allowed to do everything. Anyway, here some proof:

.
By default, members of the admin group (incl. toms-datafactory) can run any notebook in the workspace, it can manage any cluster and it can create new clusters from scratch. Without going into potential scenarios, this is clearly not preferable! Also, just removing the data factory (or any other service principal) from the admin group won’t help you because next time you run a data factory pipeline, it will automatically be added back to the group again. Instead, we need to undo the contributor rights of our service principal / managed identity.
.
2. The SCIM API script for managing access control in Azure Databricks
Luckily, Databricks provides a SCIM API where you can manage service principals, managed identities and users on a granular level. Since there is no GUI:t for adding service principles to the databricks workspace, we need to run some code. Here a script which you can use to manage your access:
# Databricks notebook source
# MAGIC %md ## maintenance notebook: manage-service-principals
# COMMAND ----------
# MAGIC %md ### import of packages
# COMMAND ----------
import pandas
import json
import requests
# COMMAND ----------
# MAGIC %md ### define variables
# COMMAND ----------
pat = 'EnterPATHere' # paste PAT. Get it from settings > user settings
workspaceURL = 'EnterWorkspaceURLHere' # paste the workspace url in the format of 'https://adb-1234567.89.azuredatabricks.net'
applicationID = 'EnterApplicationIDHere' # paste ApplicationID / ClientID of Service Principal. Get it from Azure Portal
friendlyName = 'AddFriendlyNameHere' # paste FriendlyName of ServicePrincipal. Get it from Azure Portal
# COMMAND ----------
# MAGIC %md ### get service principals
# COMMAND ----------
response = requests.get(workspaceURL + '/api/2.0/preview/scim/v2/ServicePrincipals',\
headers = {'Authorization' : 'Bearer '+ pat,\
'Content-Type': 'application/scim+json'})
pandas.json_normalize(json.loads(response.content), record_path = 'Resources')
# COMMAND ----------
# MAGIC %md ### add service principal
# COMMAND ----------
payload_raw = {
'schemas':
['urn:ietf:params:scim:schemas:core:2.0:ServicePrincipal'],
'applicationId': applicationID,
'displayName': friendlyName,
'groups':[],
'entitlements':[]
}
payload = json.loads(json.dumps(payload_raw))
response = requests.post(workspaceURL + '/api/2.0/preview/scim/v2/ServicePrincipals',\
headers = {'Authorization' : 'Bearer '+ pat,\
'Content-Type': 'application/scim+json'},\
data=json.dumps(payload))
response.content
# COMMAND ----------
# MAGIC %md ### deactivate service principal (remove service principal from all groups and entitlements)
# COMMAND ----------
response = requests.get(workspaceURL + '/api/2.0/preview/scim/v2/ServicePrincipals',\
headers = {'Authorization' : 'Bearer '+ pat,\
'Content-Type': 'application/scim+json'})
df = pandas.json_normalize(json.loads(response.content), record_path = 'Resources')
servicePrincipalID= df[df["applicationId"] == applicationID]["id"].values[0]
payload_raw = {
'schemas':
['urn:ietf:params:scim:schemas:core:2.0:ServicePrincipal'],
'applicationId': applicationID,
'displayName': friendlyName,
'groups':[],
'entitlements':[]
}
payload = json.loads(json.dumps(payload_raw))
scim_response = requests.put(workspaceURL + '/api/2.0/preview/scim/v2/ServicePrincipals/' + servicePrincipalID,\
headers = {'Authorization' : 'Bearer '+ pat,\
'Content-Type': 'application/scim+json'},\
data=json.dumps(payload))
scim_response.content
# COMMAND ----------
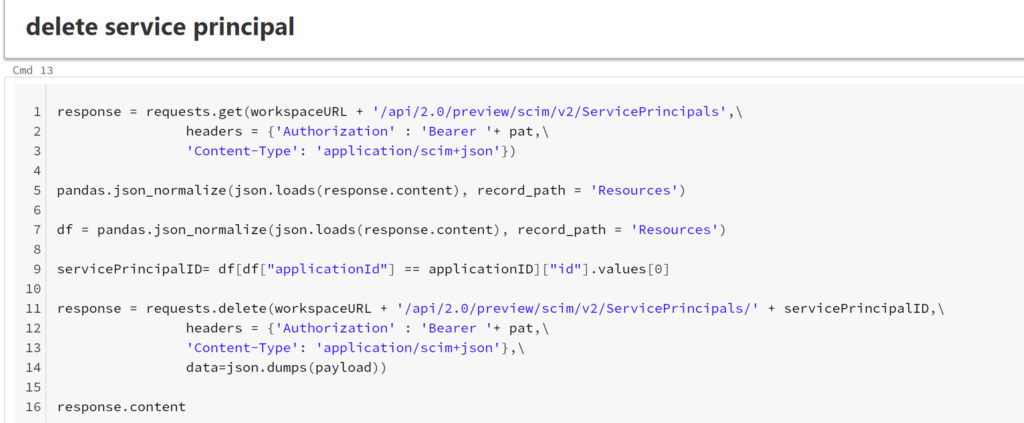
# MAGIC %md ### delete service principal
# COMMAND ----------
response = requests.get(workspaceURL + '/api/2.0/preview/scim/v2/ServicePrincipals',\
headers = {'Authorization' : 'Bearer '+ pat,\
'Content-Type': 'application/scim+json'})
pandas.json_normalize(json.loads(response.content), record_path = 'Resources')
df = pandas.json_normalize(json.loads(response.content), record_path = 'Resources')
servicePrincipalID= df[df["applicationId"] == applicationID]["id"].values[0]
response = requests.delete(workspaceURL + '/api/2.0/preview/scim/v2/ServicePrincipals/' + servicePrincipalID,\
headers = {'Authorization' : 'Bearer '+ pat,\
'Content-Type': 'application/scim+json'},\
data=json.dumps(payload))
response.content
# COMMAND ----------
.
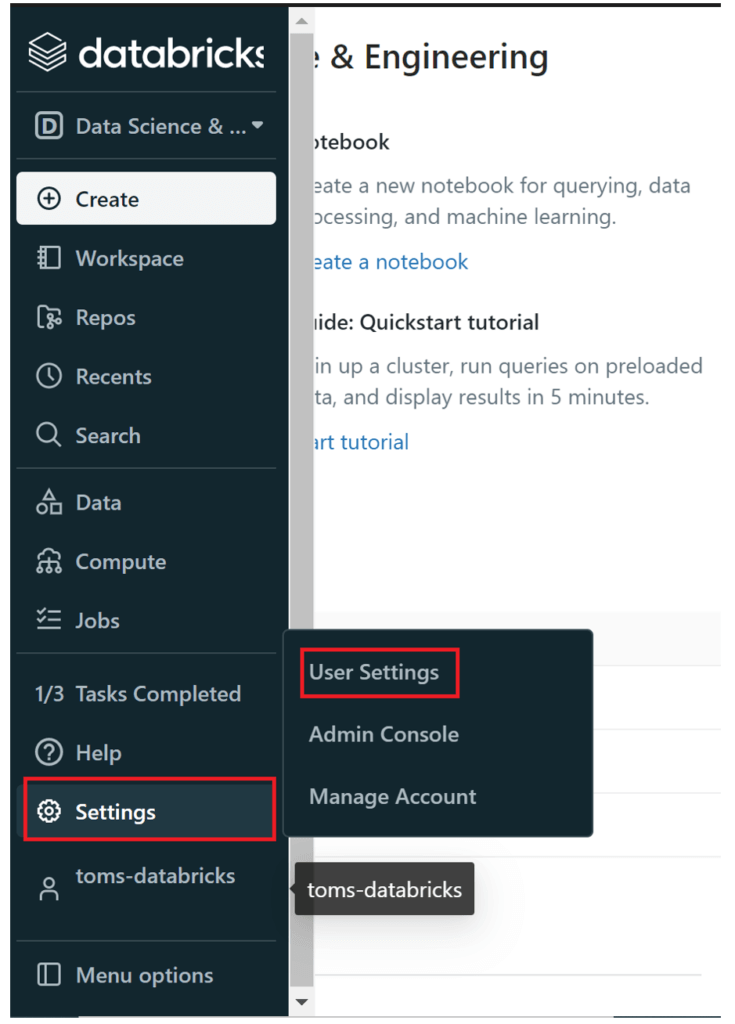
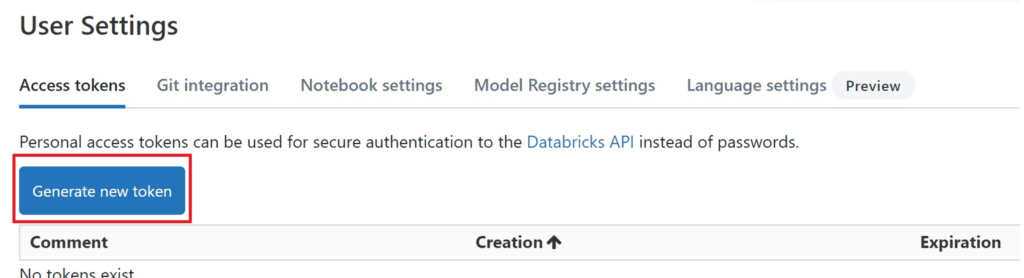
Let’s go through the script starting from the top by defining the variables pat, workspaceURL, applicationID and friendlyName. The PAT needs to be created in the databricks workspace:
.
The workspaceURL can be fetched from the URL bar and shall be in the format “https://adb-1234567.89.azuredatabricks.net”. Note, you need to remove the backslash (“/”) from the the end of the URL!
The applicationID of our resource or service principal / app registration can be found in the Azure portal. In the case of our data factory, we can get it from here:
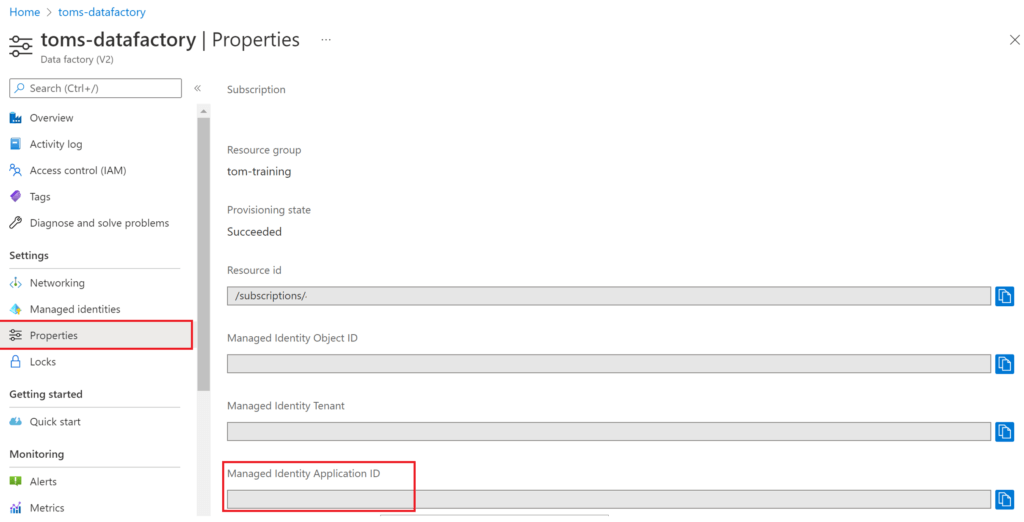
.
friendlyName is something that you can choose yourself. I usually take the resource name, so here toms-datafactory. With all parameters specified, we now can run the script to add a service principal with help of the SCIM API:
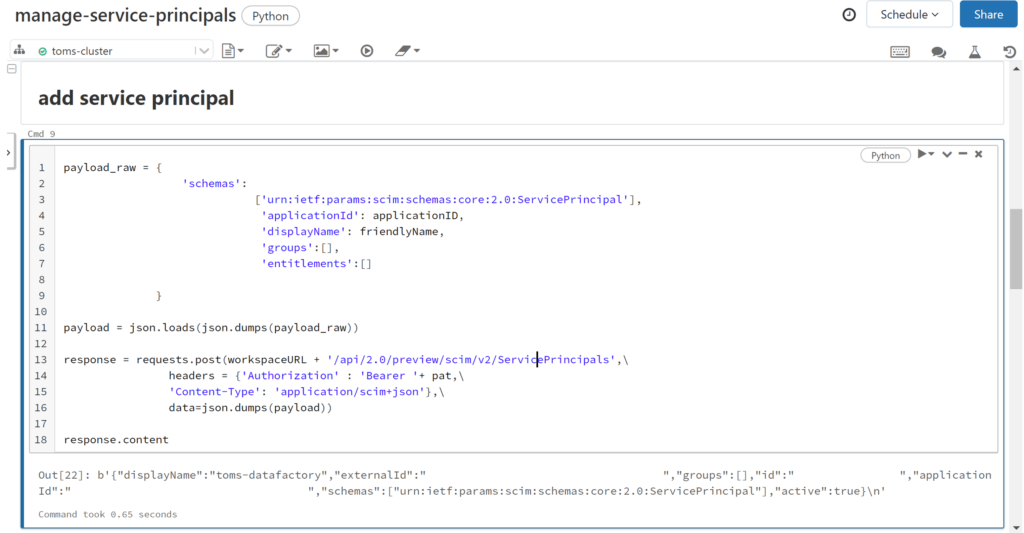
.
The response looks good. Let’s see whether our service principal has successfully been added with the get service principal python snippet:
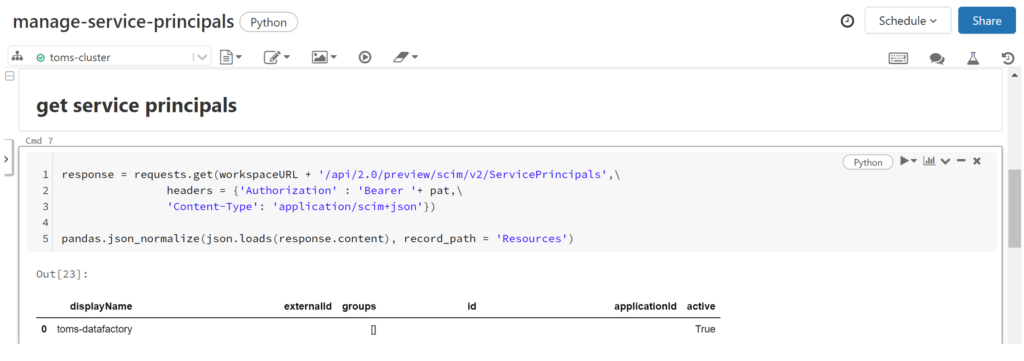
.
Lovely! Let’s verify it also in the databricks workspace GUI:t:
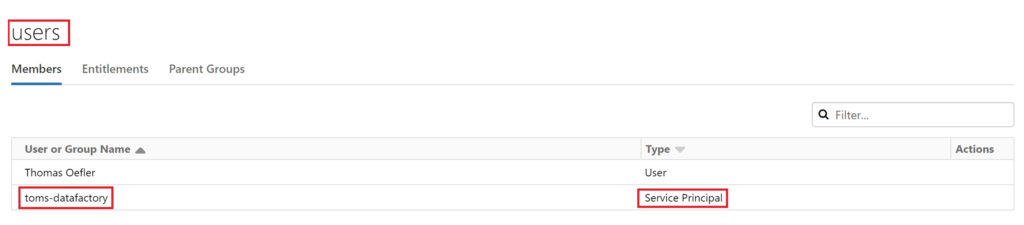
.
Great! Let’s head back to our data factory and try out a test run of our notebook called datafactory-test:
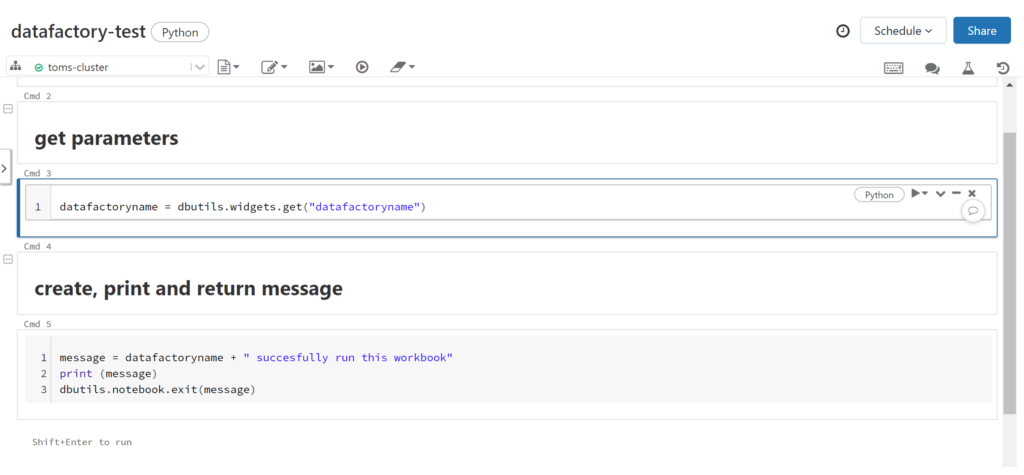
.
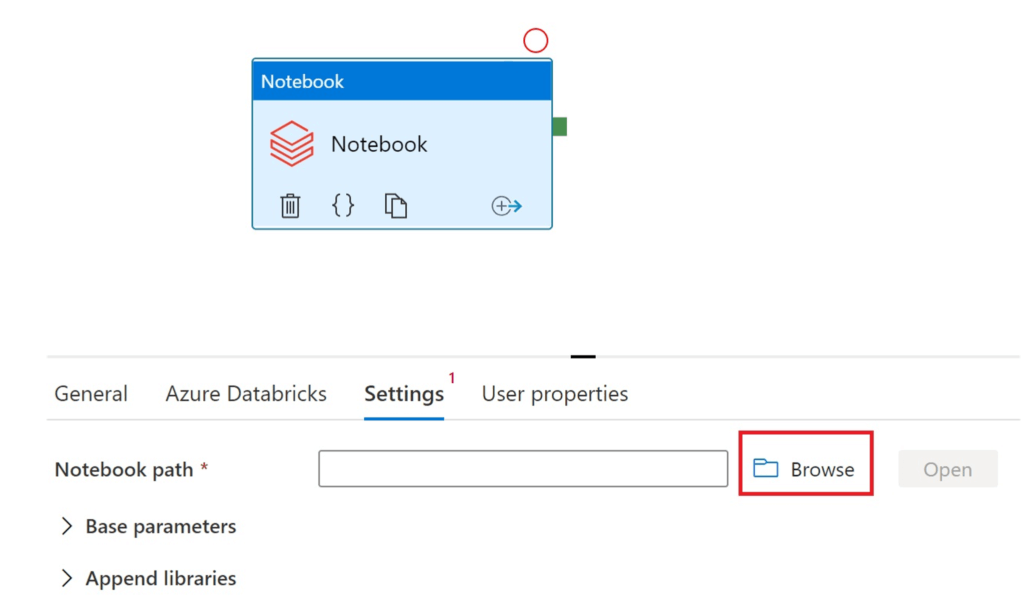
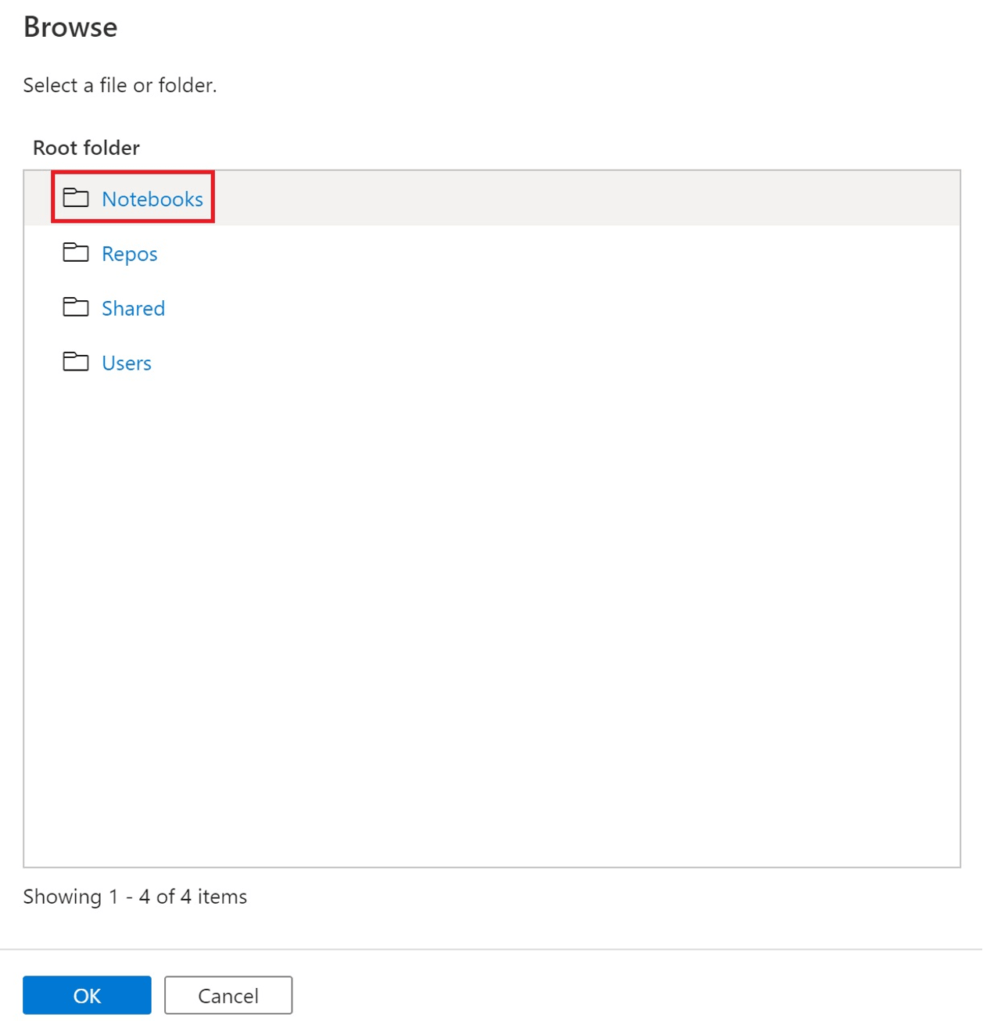
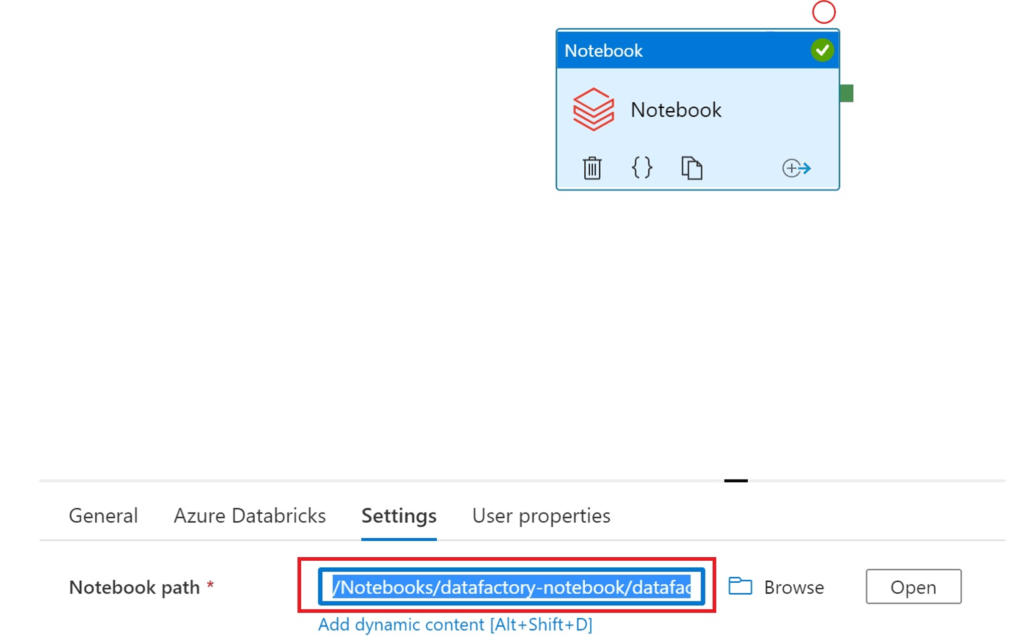
We drag a notebook activity into our pipeline and select Browse in Settings to specify the path to our notebook (the path is Notebooks > datafactory-notebook > datafactory-test.py)
.
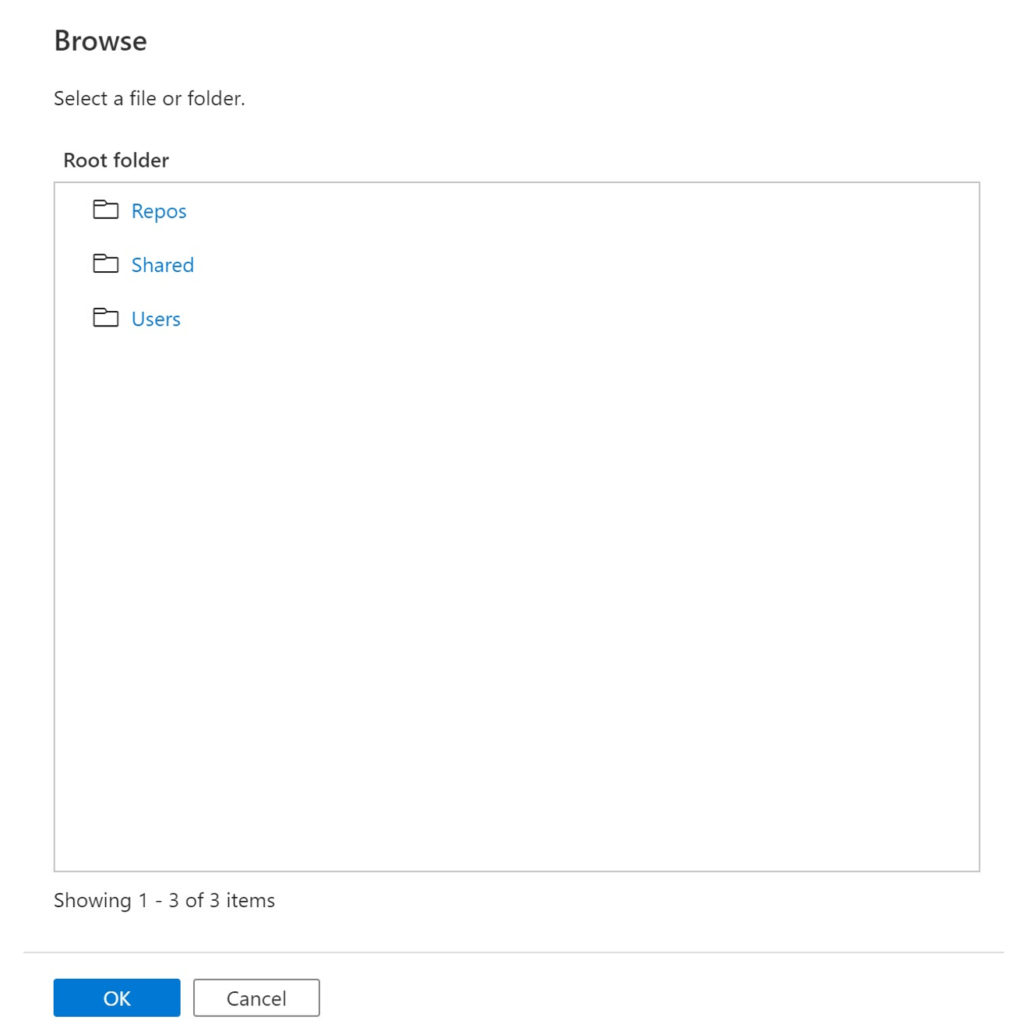
Unfortunately, the folder Notebooks is not displayed in toms-datafactory:
.
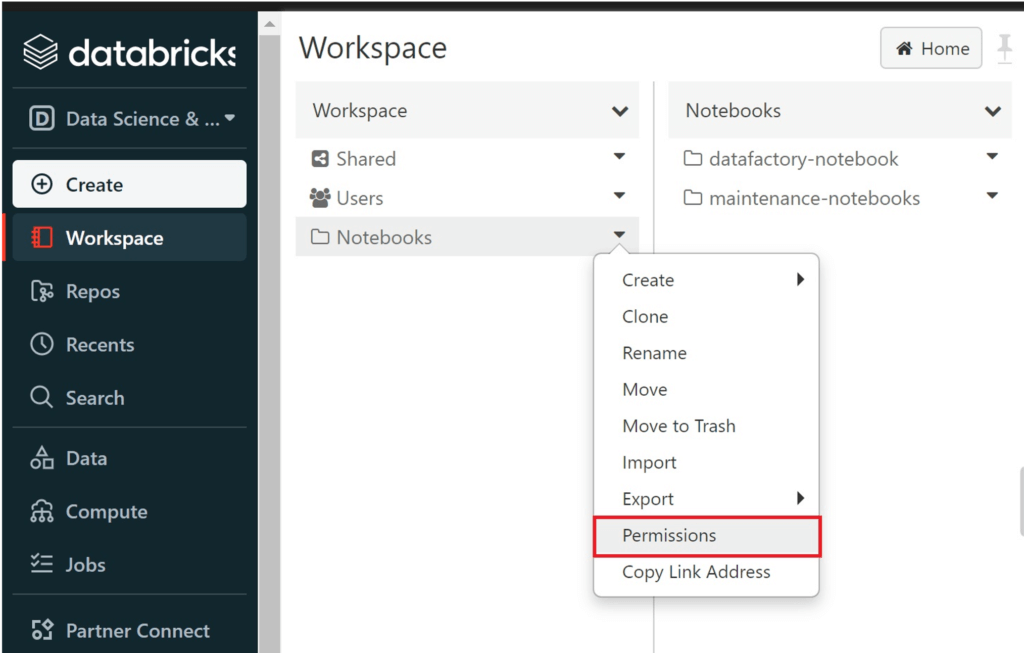
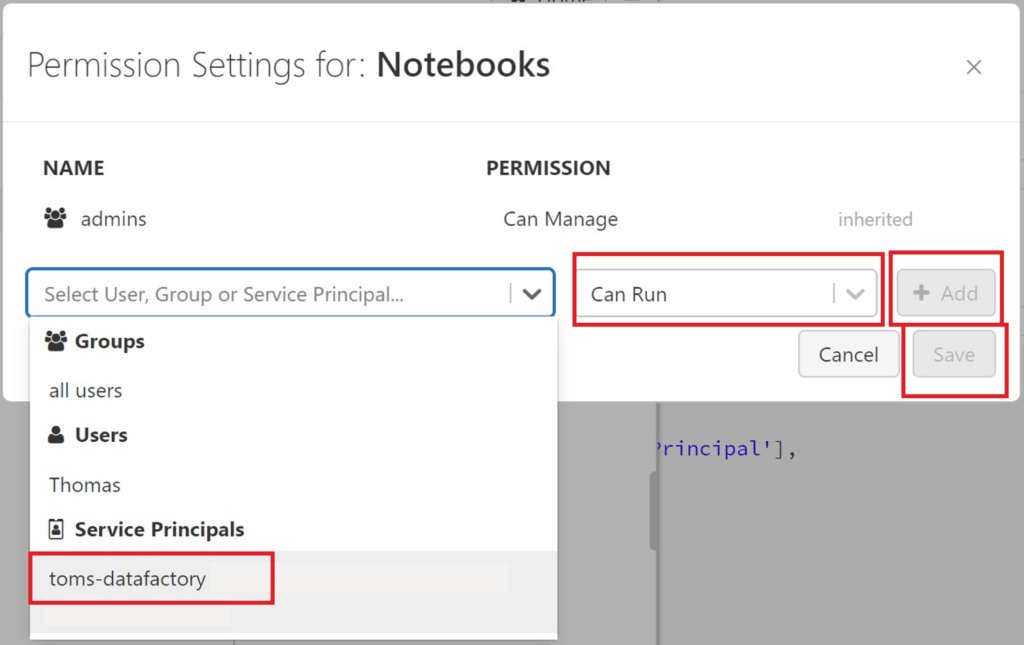
To be honest, this is actually a good sign! Our toms-datafactory does not have access to anything else than its own folders in the workspace, meaning it cannot just run any notebook. Let’s add toms-datafactory to Permissions of the Notebooks folder:
.
Finally, we can see the Notebooks path in toms-datafactory as well:
.
We can also give permission on a much lower level like subfolders or even the notebook itself. But then you cannot use the Browse function in data factory. Instead, you need to write the path directly in to the box:
.
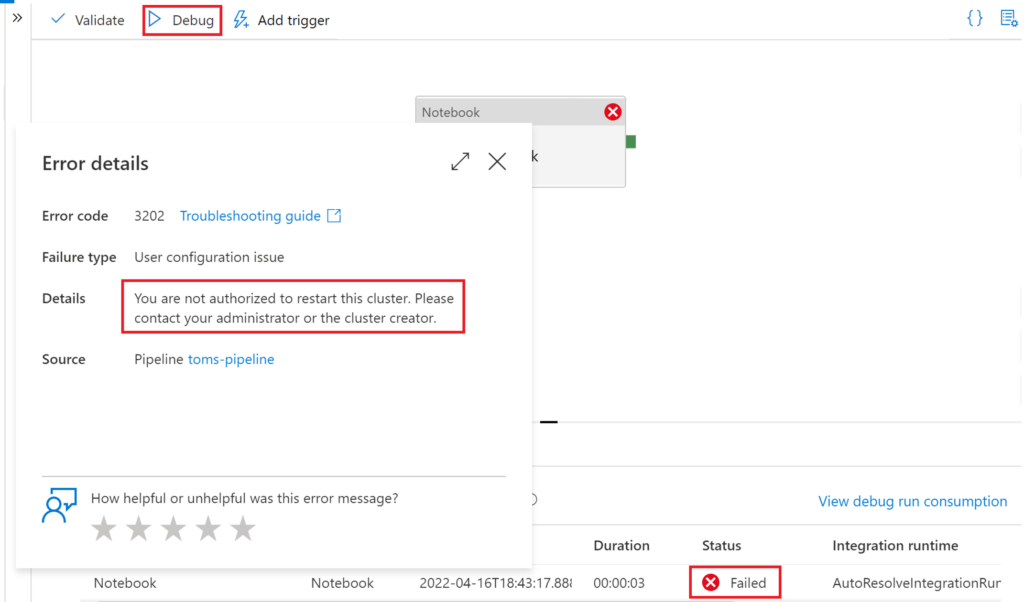
After having specified the path for the notebook in toms-datafactory, let’s run the notebook:
.
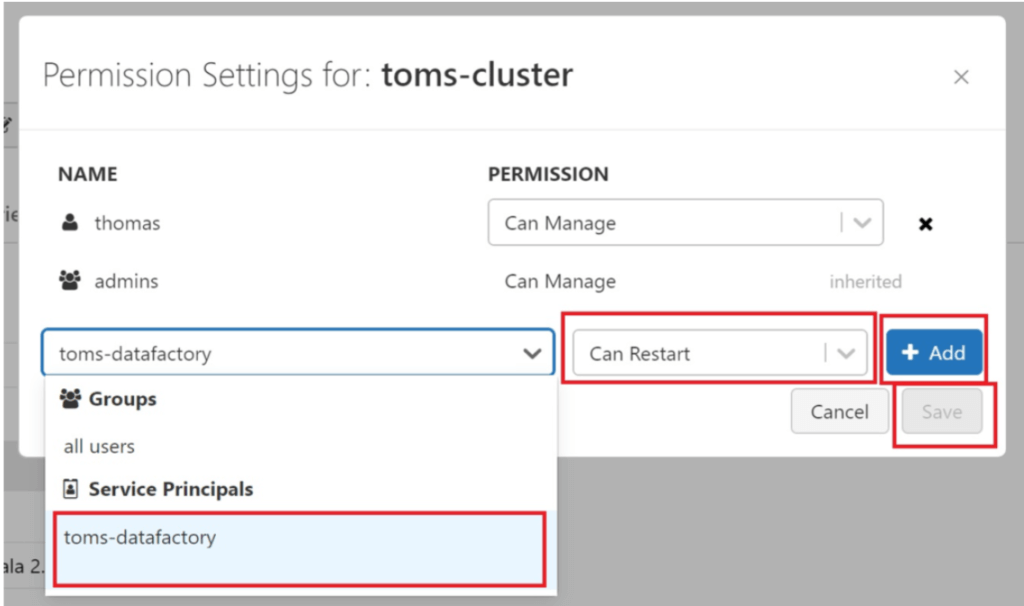
Surprise! We cannot start the cluster… Once again, this is good news, since we must explicitly share the permission for running the cluster in databricks:

.
Let’s try to run the notebook from data factory once more:
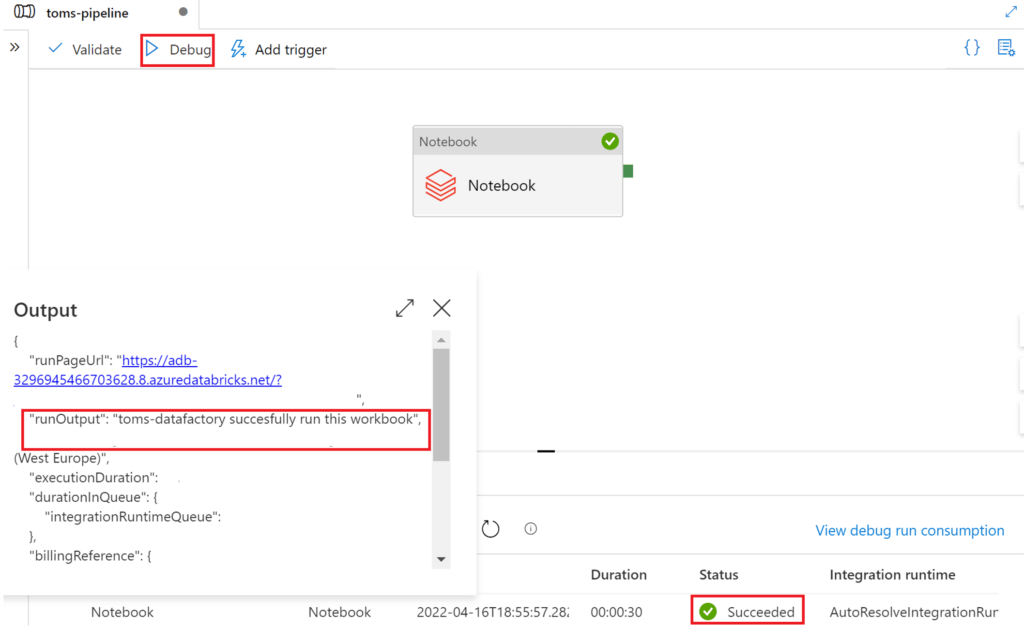
.
Finally, other parts in the script include deactivating a user, meaning all groups and entitlements are removed, or deleting it from the databricks workspace:
.
3. How to add the python script to your databricks workspace
One way is to copy and paste the code into Notepad, save it as yourfilename.py and upload it to databricks:


.
end.
Personally, I prefer to have a dedicated “maintenance” folder in databricks with similar scripts like this one, i.e. managing key vault scopes and secrets. Also, I recommend to manage your access control by using groups rather than the service principal level. You can create a dedicated group for your Azure DevOps service principal or for other purposes. Then, you build an access structure by sharing permissions on to each group. Lastly, you allocate your service principals and users to the respective groups. This makes it a lot easier to manage your access control.